[Nail Art Classroom] Swarovski Crystal Pixie Nail Design
- on 01.04.17
- Highlight, Tutorial
- No Comments
- Digg
- Del.icio.us
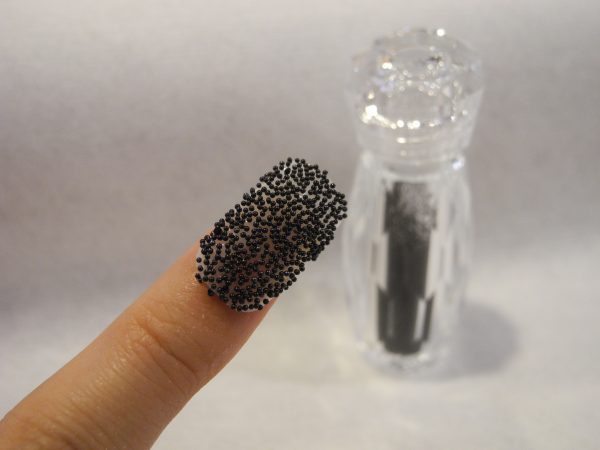
We have shown you some gorgeous nail art designs with Swarovski Crystal Pixie in the previous two lessons. This time, we are going to teach you step by step a no-none sense way of application that is simple but stunning.
Steps:
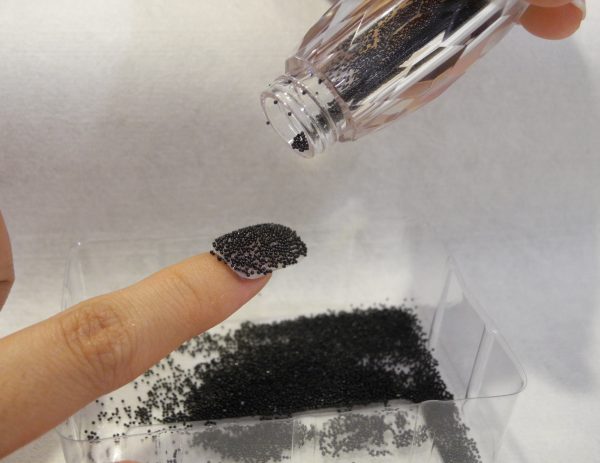
1. Apply a layer of clear base coat While the base coat is still wet, pour Swarovski Crystal Pixie on the nail.
2. Keep in mind that it is a clear base, try to cover the whole nail surface by gently spreading out the CRYSTAL PIXIE. Press down lightly for an even distribution。
3. When the polish is all dry, finish with a layer of top coat for stabilization.
* TIPS:
Clear polish dries out much faster than the color ones. You can have better control if you finish one nail at a time. Also, it make sense to apply CRYSTAL PIXIE only on 2 to 3 fingers for accentuation. the rest of the nails can go with simple shades.
When you get the hang of it, you can start to play with all those intricate design that you always wanted. Go for it!
Make Your Appointment Today!
Call Us: (852)2840-0660
Write to Us: rainbownails @ rainbownails.com.hk!
Leave a Reply